1.1 how to add an attendee
Want to give someone complimentary tickets? Know someone who paid for their tickets offline? You can add attendees manually to make sure they are included in all of your reporting and event communication by completing a separate registration on their behalf. No fees are charged on manually added orders, and you can even send an order confirmation email after adding them in. From your event's “Manage” page, go to “Manage Attendees” and select “Add Attendees” to get started.
2.1 steps to add an attendee
a) go to your event manage page
After logging in and creating an event, find your event on the “Manage Events” page, and then select “Manage.” You will find the “Attendees” option on right side of dashboard.
b) go to "add attendees" on the event dashboard
From the options menu, scroll to the bottom until you see the “Attendees” section. You can view event ticket section. Here you can purchase tickets for your attendees.
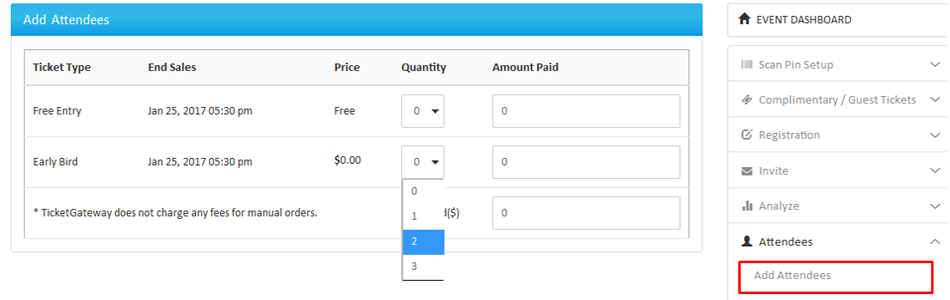
c) enter the quantity of tickets
On the "Add attendees" page, click or tap inside the field under "Quantity" to enter the number of tickets for the attendee(s). The "Amount Paid" and "Total Paid" will automatically update with the ticket price multiplied by quantity, but these fields can also be edited if special adjustments need to be made.
If you do not want to fill out registration information for each person, make the registration information not required before you customize your order form.
d) choose a payment type
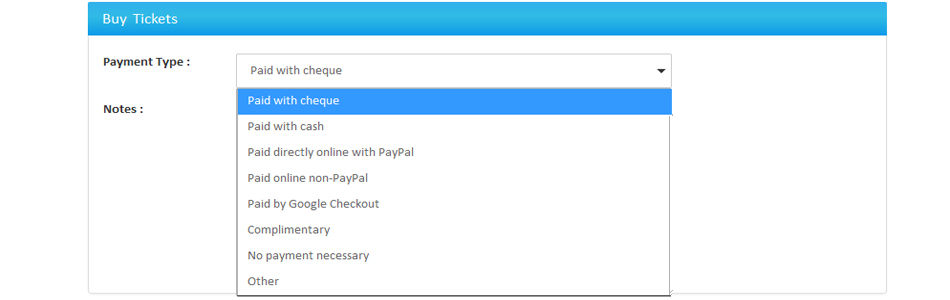
The "Payment Type" will be set to "Paid with Cheque" by default, but you can use the drop-down menu to select a different option..
e) enter a note about that order
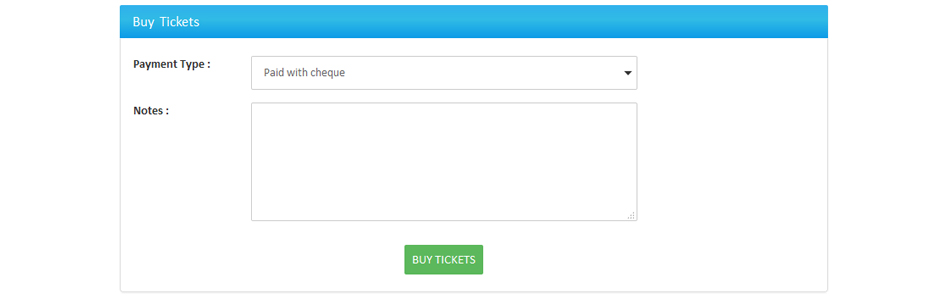
Click or tap in the text field under "Notes" to enter any details you would like to associate with that particular order and proceed to buy tickets.
3.1 add attendees in reserved
After logging in and creating an event, find your event on the “Manage Events” page, and then select “Manage.” You will find the “Attendees” option at right side of dashboard.
a) Go To "Add Attendees" On The Event Dashboard
From the options menu, scroll to the bottom until you see the Attendees section. You can view the reserve ticket section. Here you can buy tickets for your attendees.
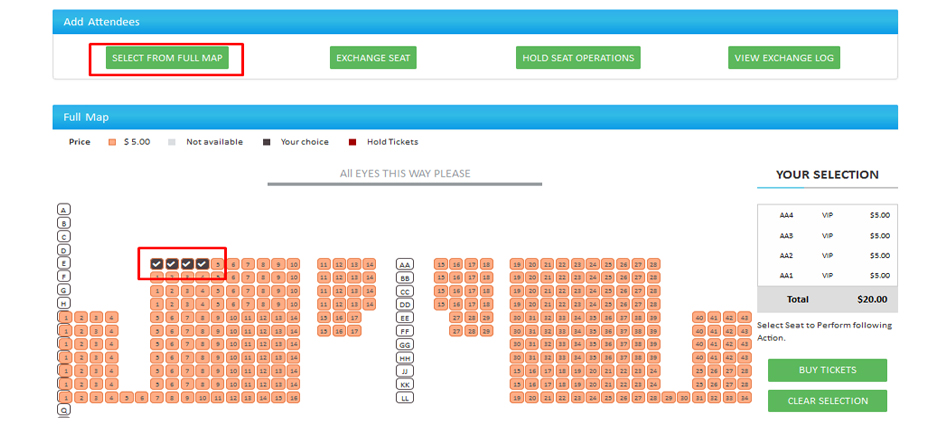
- Click on select from Full Map button to see map.
- Promoter can buy tickets for attendees by selecting available seats.
- And can buy tickets with available payment options.
- Promoter can exchange customer seats with attendees seats.
- Promoter can buy hold tickets. (If promoter intends to offer those tickets to their special guest or friends then he can buy tickets for them with available payment options).
- Promoter can release hold seats. (If Promoter wants other users can buy those tickets then he can release and make available for customers).
